Installing SickBeard on OS X 10.8
SickBeard only has two real requirements to run on your Mac. The first being Python, which comes with Mountain Lion, and the second is Cheetah, which will need to be installed.
However, for SickBeard to be useful you’ll also need SABnzbd+ and a Usenet provider like UsenetServer. They have a fast and reliable service and offer a 14 day free trial with 10 GB of downloads to test it out.
To install Cheetah, we’ll need to install the Command Line tools.
Installing Command Line tools
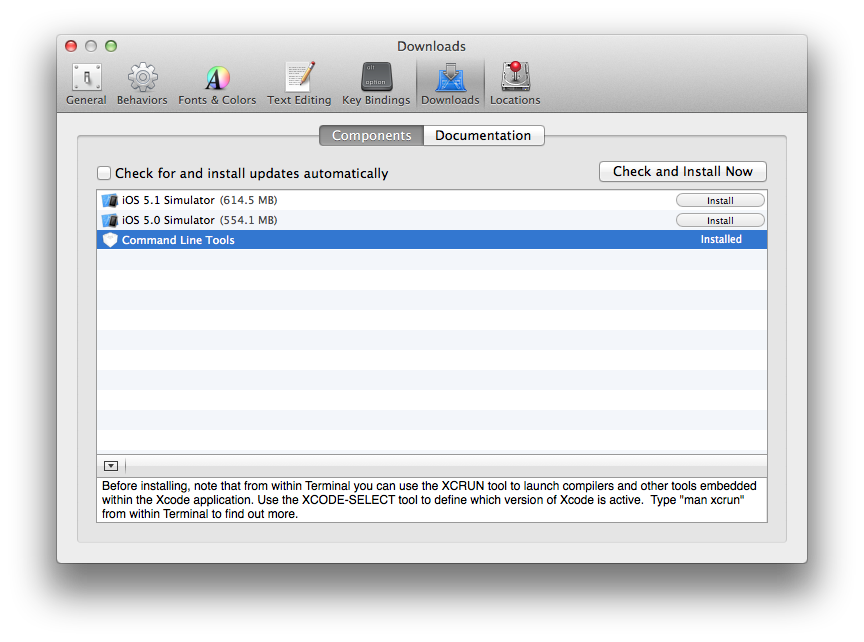
Command Line Tools are needed because Cheetah has to be built and compiled from source code. First you will need to have Xcode installed. If you don’t have it already it is available as a free download from the Mac App Store. Open Xcode and open Preferences. Choose Downloads and then select Command Line Tools and click the Install button. Once this finishes you can close Xcode.

Installing Cheetah
So now that the requirements for Cheetah have been set we need to download and install Cheetah from source. Open Terminal and run the following commands.
curl http://pypi.python.org/packages/source/C/Cheetah/Cheetah-2.4.4.tar.gz -o cheetah.tar.gz

tar -zxvf cheetah.tar.gz
cd Cheetah-2.4.4
sudo python setup.py install
Installing SickBeard
To make sure that we are installing the latest and greatest version of SickBeard and to make it easier to keep the software up to date we will be using git. So first you need to install git if you don’t have it already. You can get the OS X binary here. If you have still have Terminal open cmd+q out of it and then reopen. cd to the directory you want to install SickBeard in. Then type and run the following:
git clone git://github.com/midgetspy/Sick-Beard.git
Once this finishes downloading you will have a folder called Sick-Beard. cd int the new folder and then type the following:
python sickbeard.py -d
The -d tell SickBeard to run as a daemon. This way when you close terminal it won’t close the app. At this point you should be looking at a browser window opened to SickBeard. If you don’t see this then just fire up your favorite browser and navigate to http://localhost:8081.
Autostarting SickBeard on Login and Keeping it Running
Starting from the command line every time can be a bit of a pain, so let’s make it easier. Currently SickBeard has an issue with running in daemon mode under Mountain Lion that causes the app to spontaneously close. I’ve made a simple AppleScript app that gets around this bug. It starts SickBeard in non-daemon mode but still works pretty much the same way.
Since daemon mode is what’s not working all that’s necessary to get around the bug is to not use daemon mode. Here it is:
# This script starts SickBeard and suppressed the output so
# that it runs as if in daemon mode while avoiding the daemon mode
# issue. Once you have changed the settings
# save this script as an Application and add it to your Login Items.
# Change the following line to the path to your SickBeard folder

set pathToSickBeard to "~/Development/Sick-Beard"

#You probably don't want to change anything below here

do shell script "python " & pathToSickBeard & "/SickBeard.py > /dev/null 2>&1 &"
Download the app and open it in AppleScript Editor. You’ll probably have to open AppleScript Editor and open the app through the File –> Open. Set the path of your SickBeard folder and then set the loopTime to the frequency of which you want it to check to make sure SickBeard is running. The default is to check every minute. I have already edited the plist file for this app so that it will not show an icon in dock.
Once you are done, save the AppleScript app and move it to your Applications folder. Now you just need to add it as a Login Item. Open System Preferences –> Users & Groups and click the Login Items tab. Click the plus icon and add the SickBeardHB app. The app is configured so that it will not show in your dock.
SickBeard is installed, now what?
SickBeard is now installed on your machine but it still needs to be configured. Lucky for you, I happen to have written a guide for just that, getting SickBeard configured and working with SABnzbd+.